Introducing: Timeline
A new way to see your entire resource schedule, at a glance, from a single view.
March 17, 2026
Running a coworking space requires coordinating many moving parts. Knowing which resources are free, when they’re free, and across how many locations is one aspect that is critical for operators to be able to understand quickly.
But the standard calendar grid was not designed for the booking density of a real working day. Bookings stack up. Overlapping reservations become hard to read. Checking whether a specific room is available at a specific time means switching between views, scrolling, and second-guessing. For spaces managing meeting rooms, hot desks, studios, and equipment all at once, that friction adds up.
That’s why we built Timeline, a new way to see and manage your entire resource schedule from a single, resource-centred interface. Instead of a calendar organised around dates and individual events, Timeline organizes around what actually drives your operations: your resources.
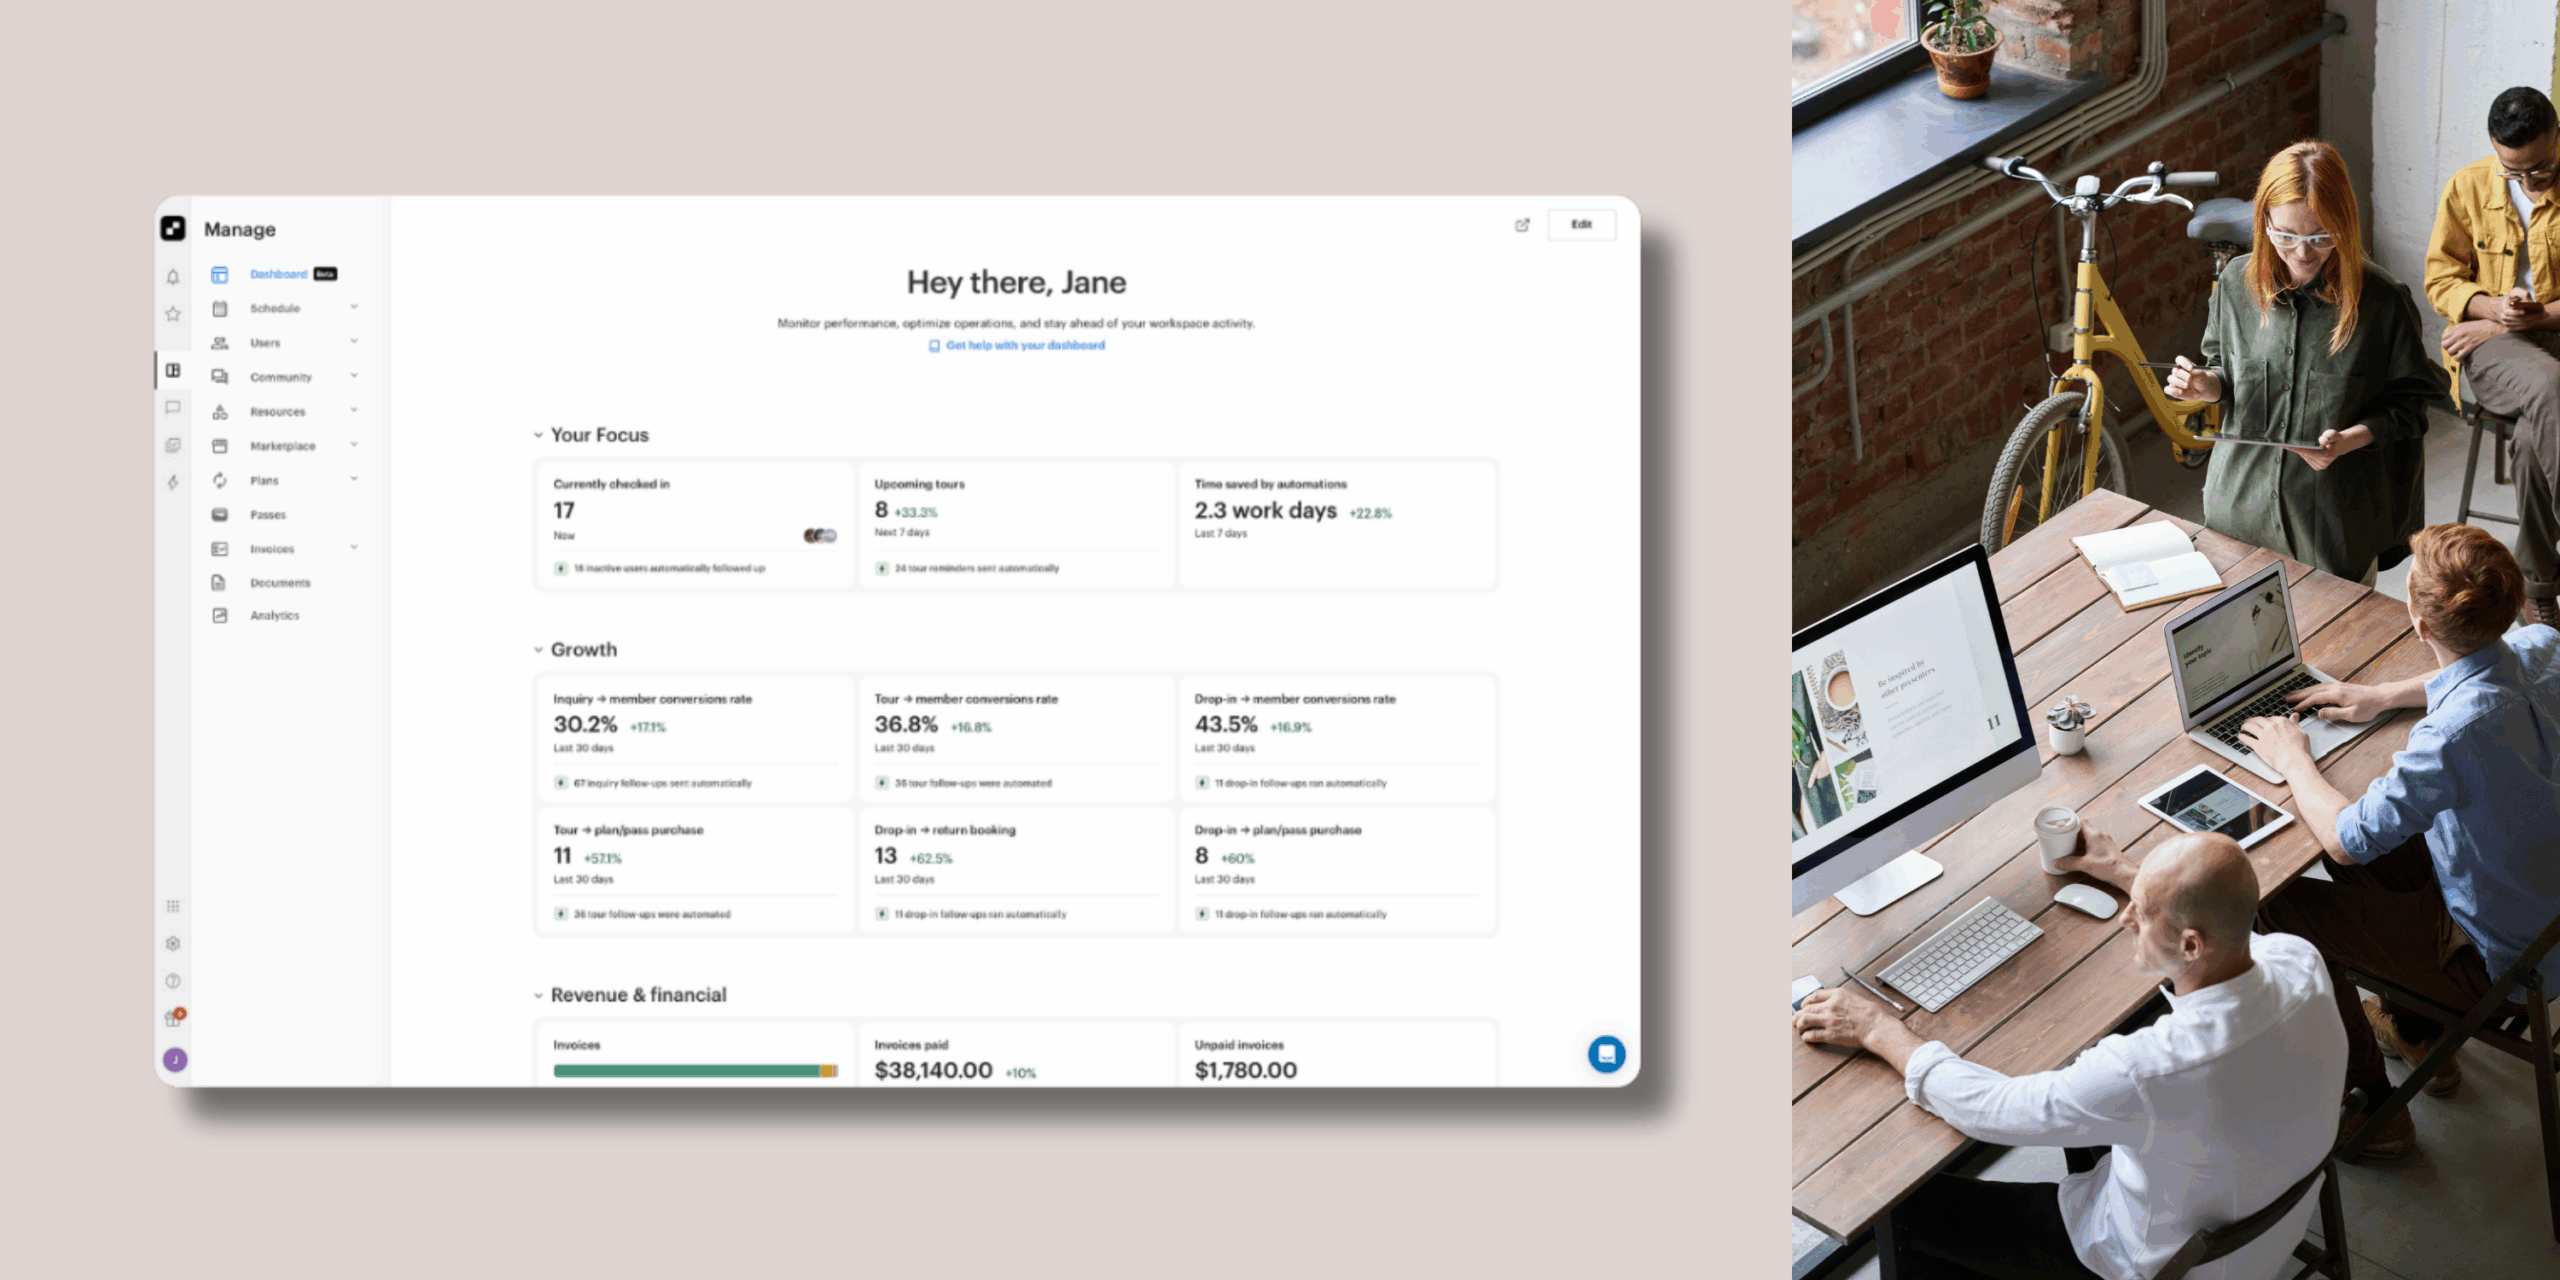
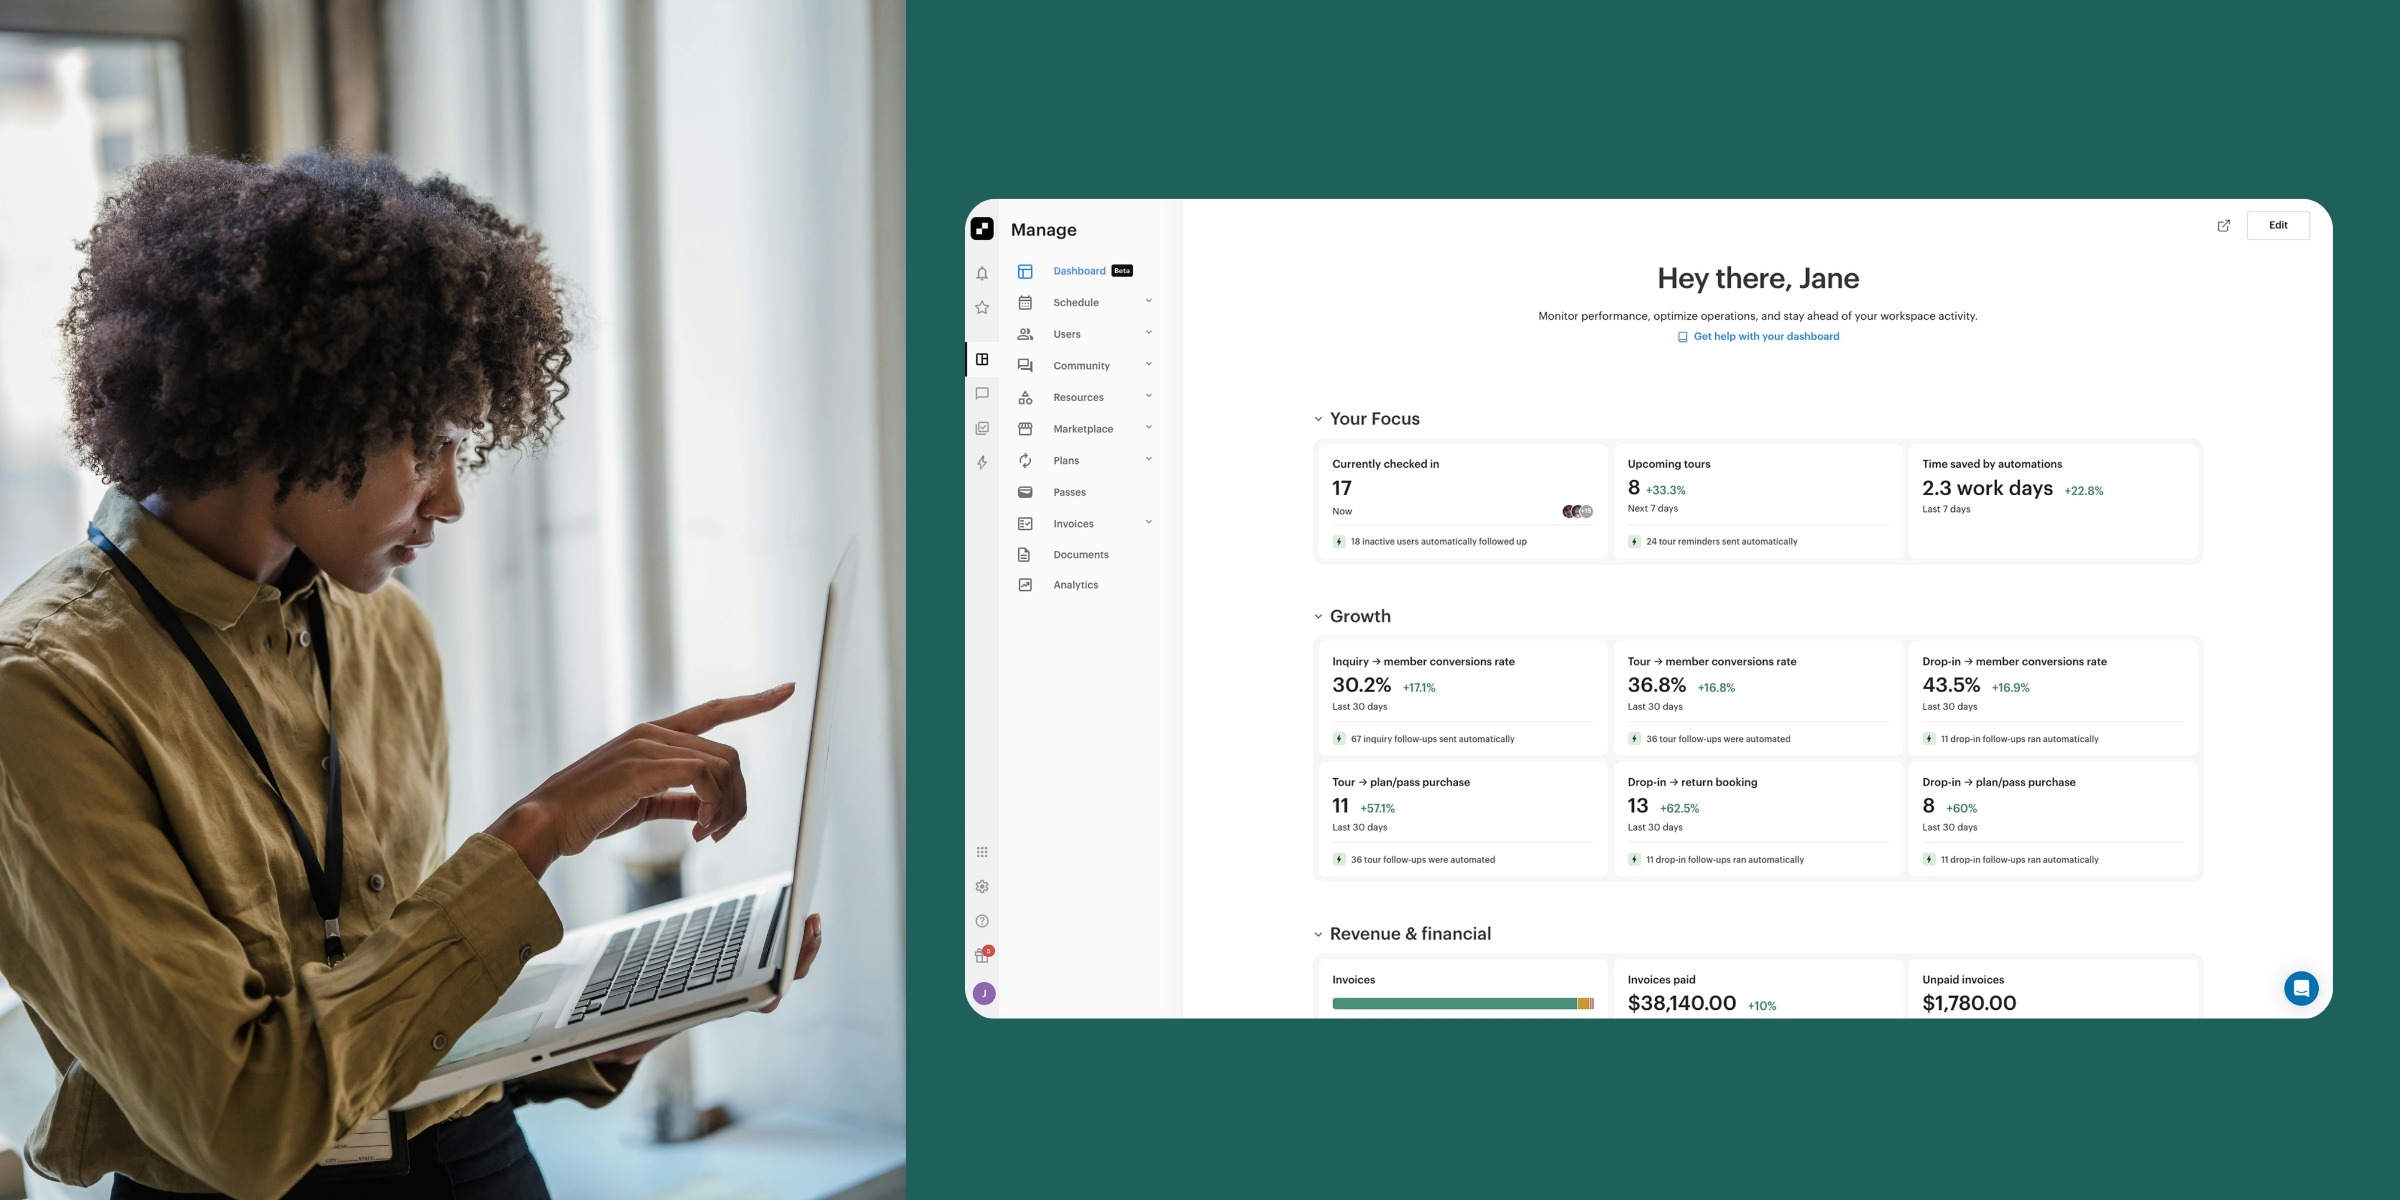
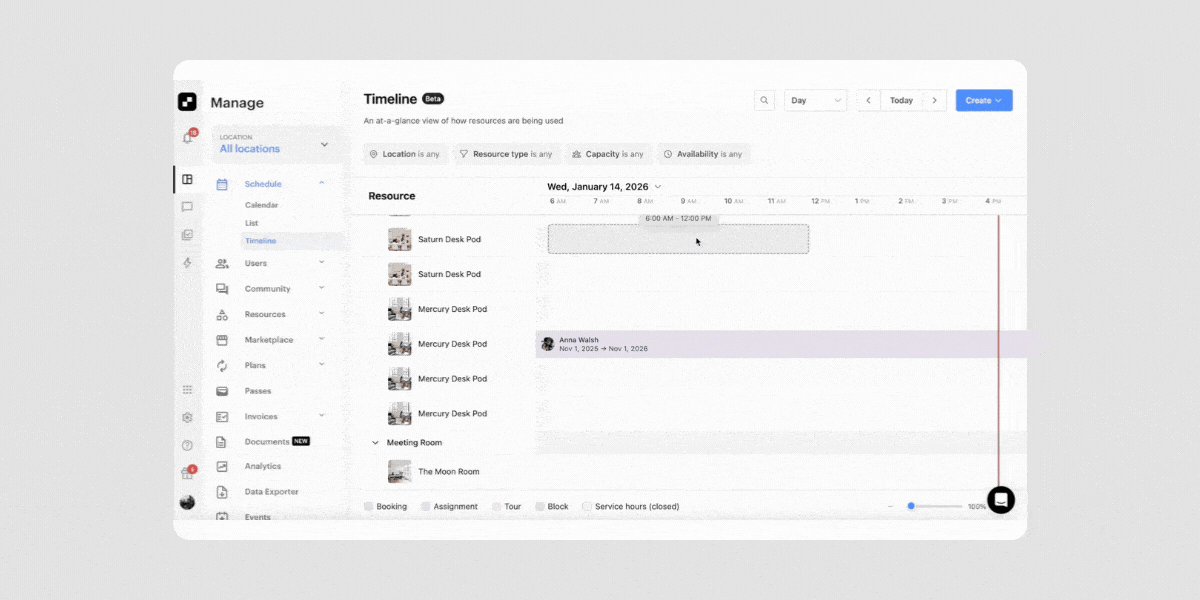
Timeline is a new scheduling interface now available under the Schedule tab in your admin dashboard. To find it, go to Manage > Schedule > Timeline.
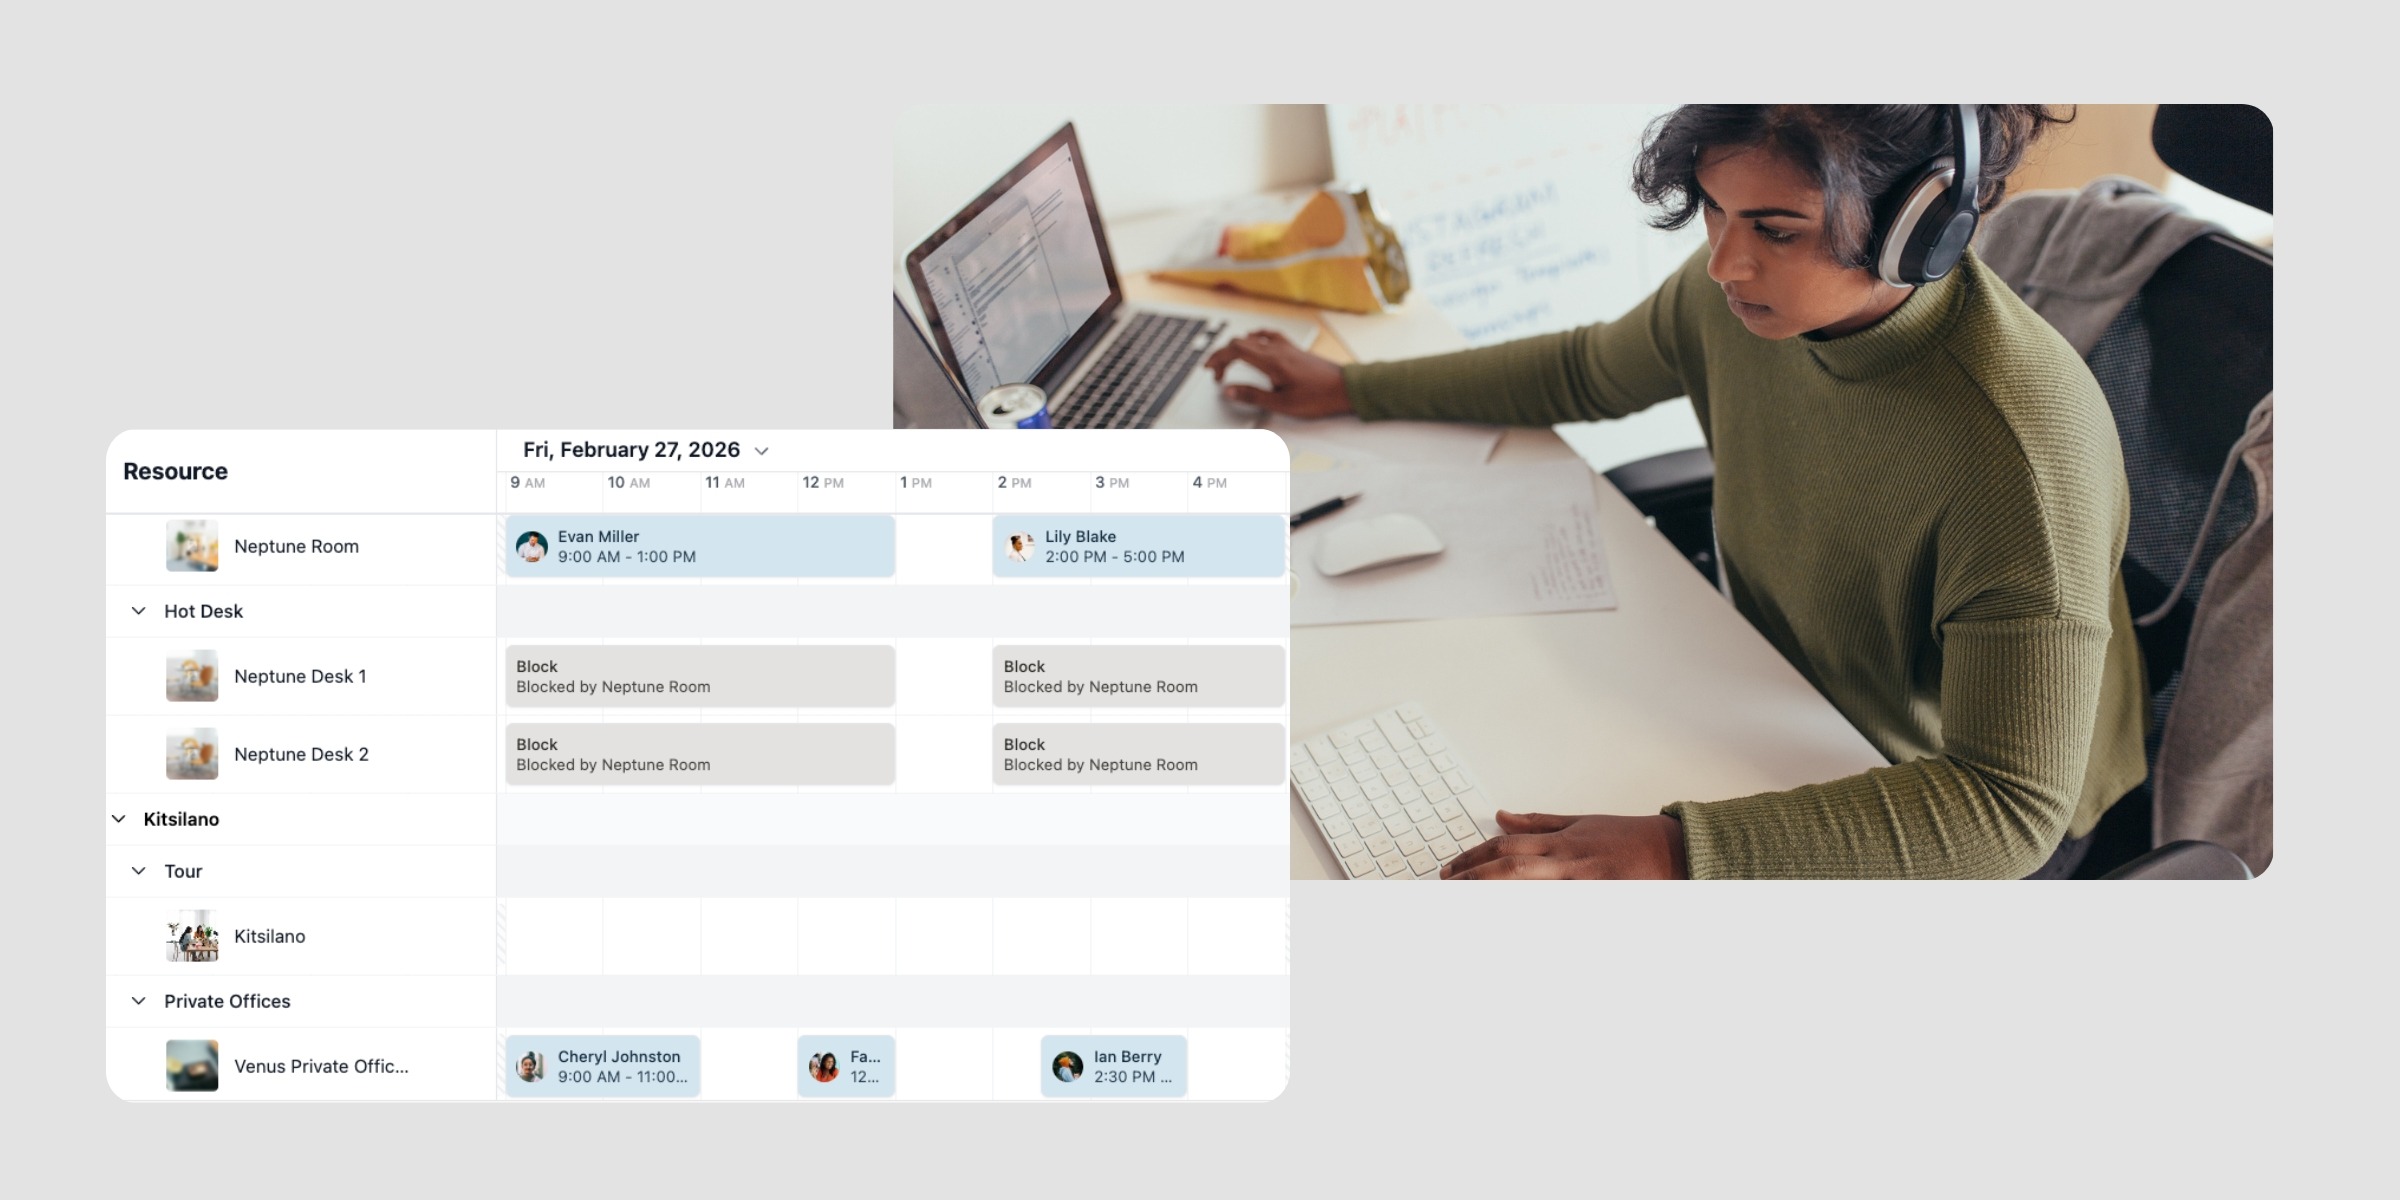
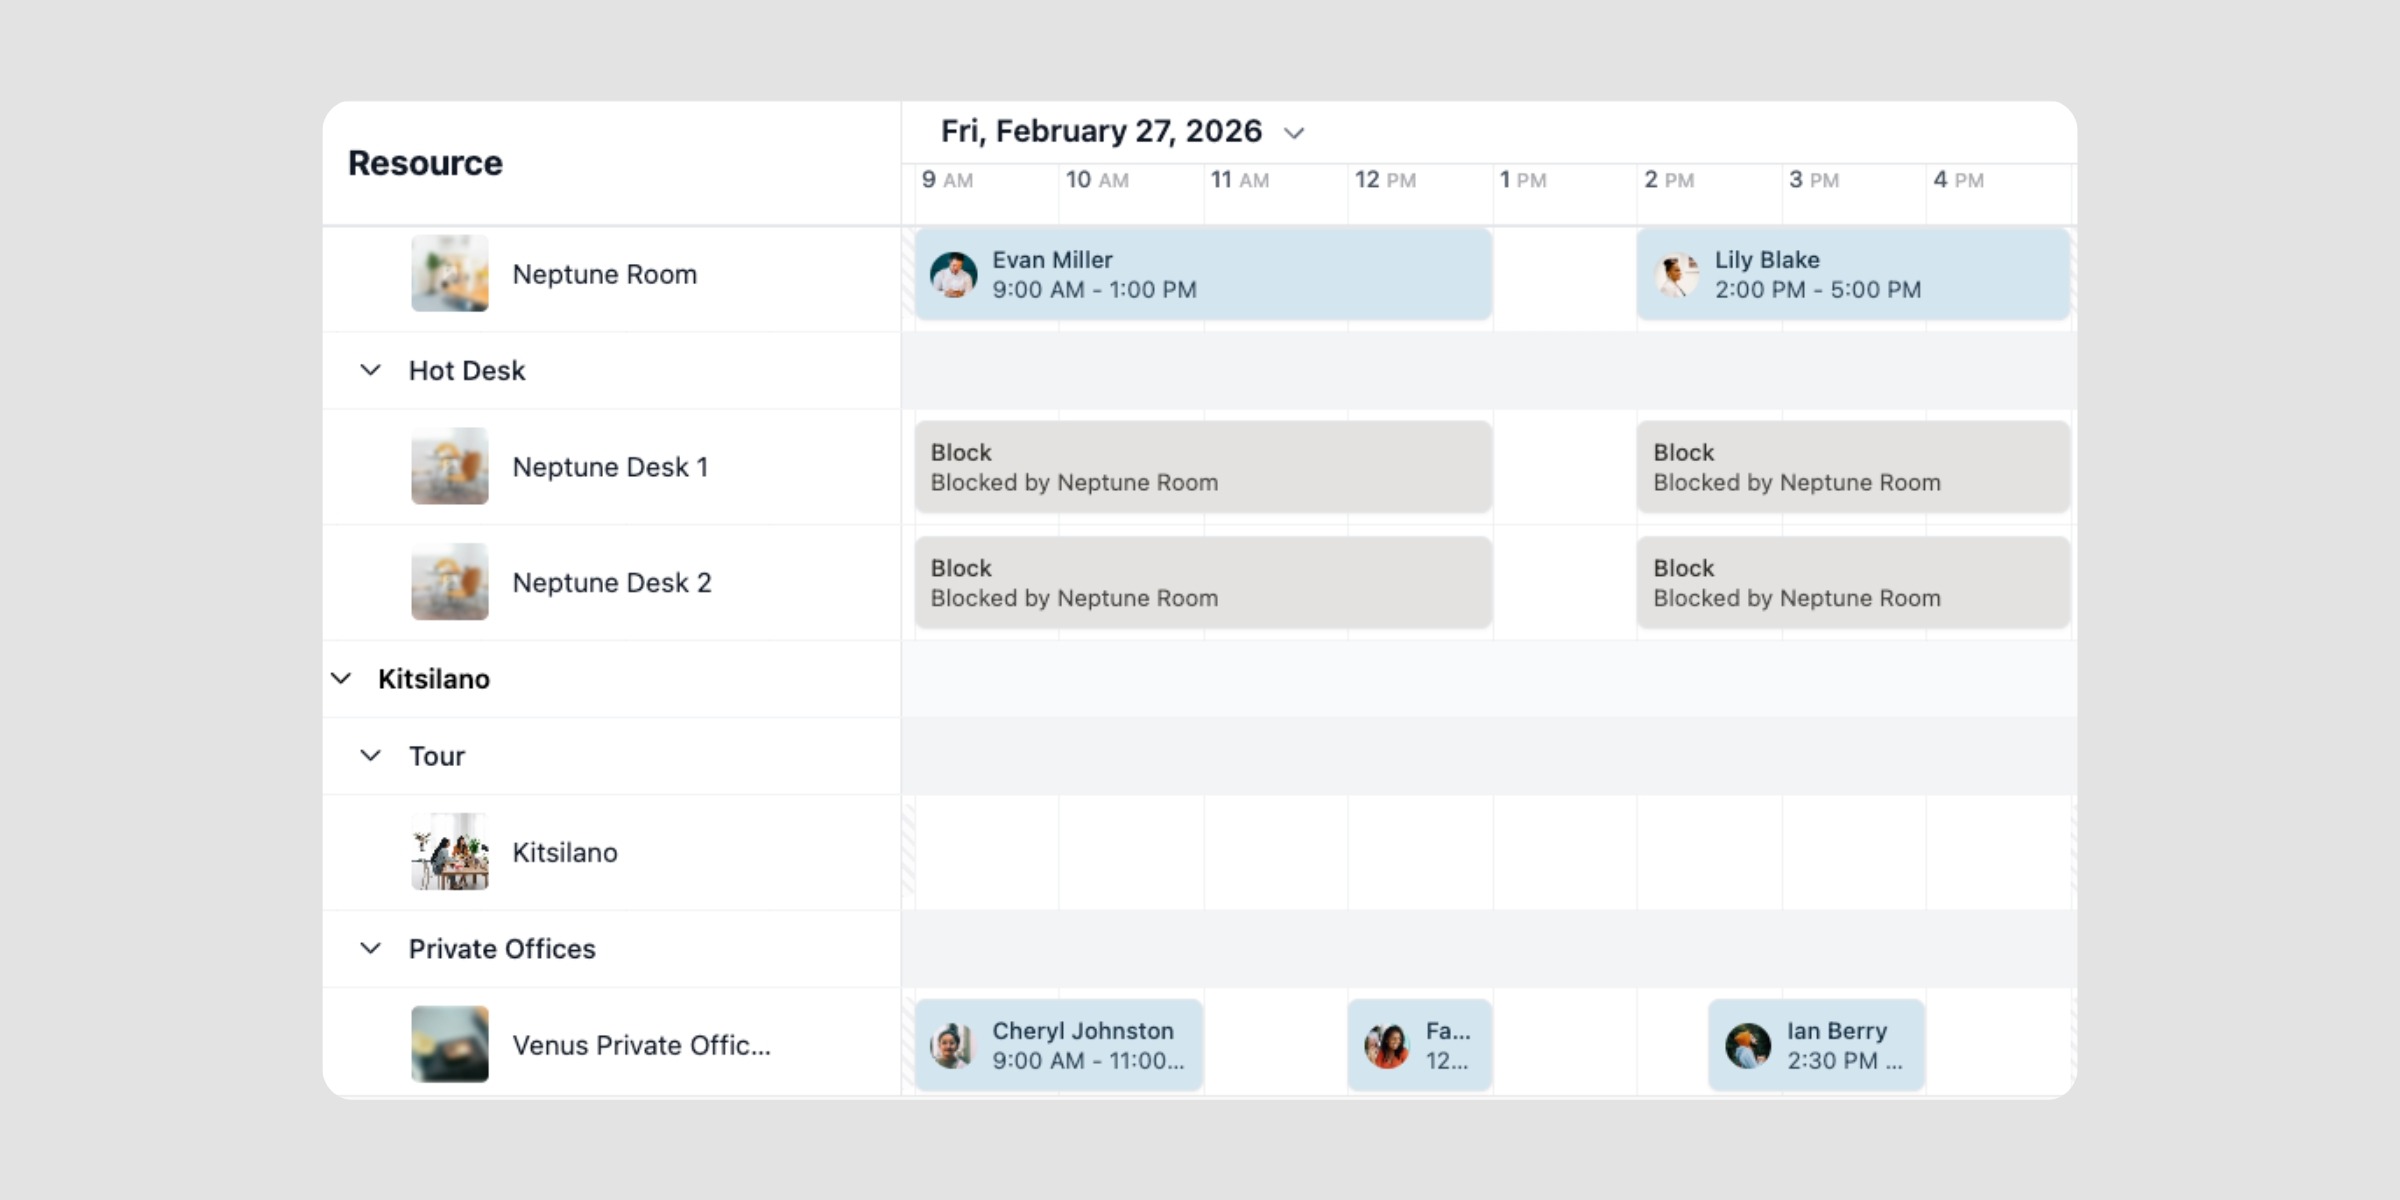
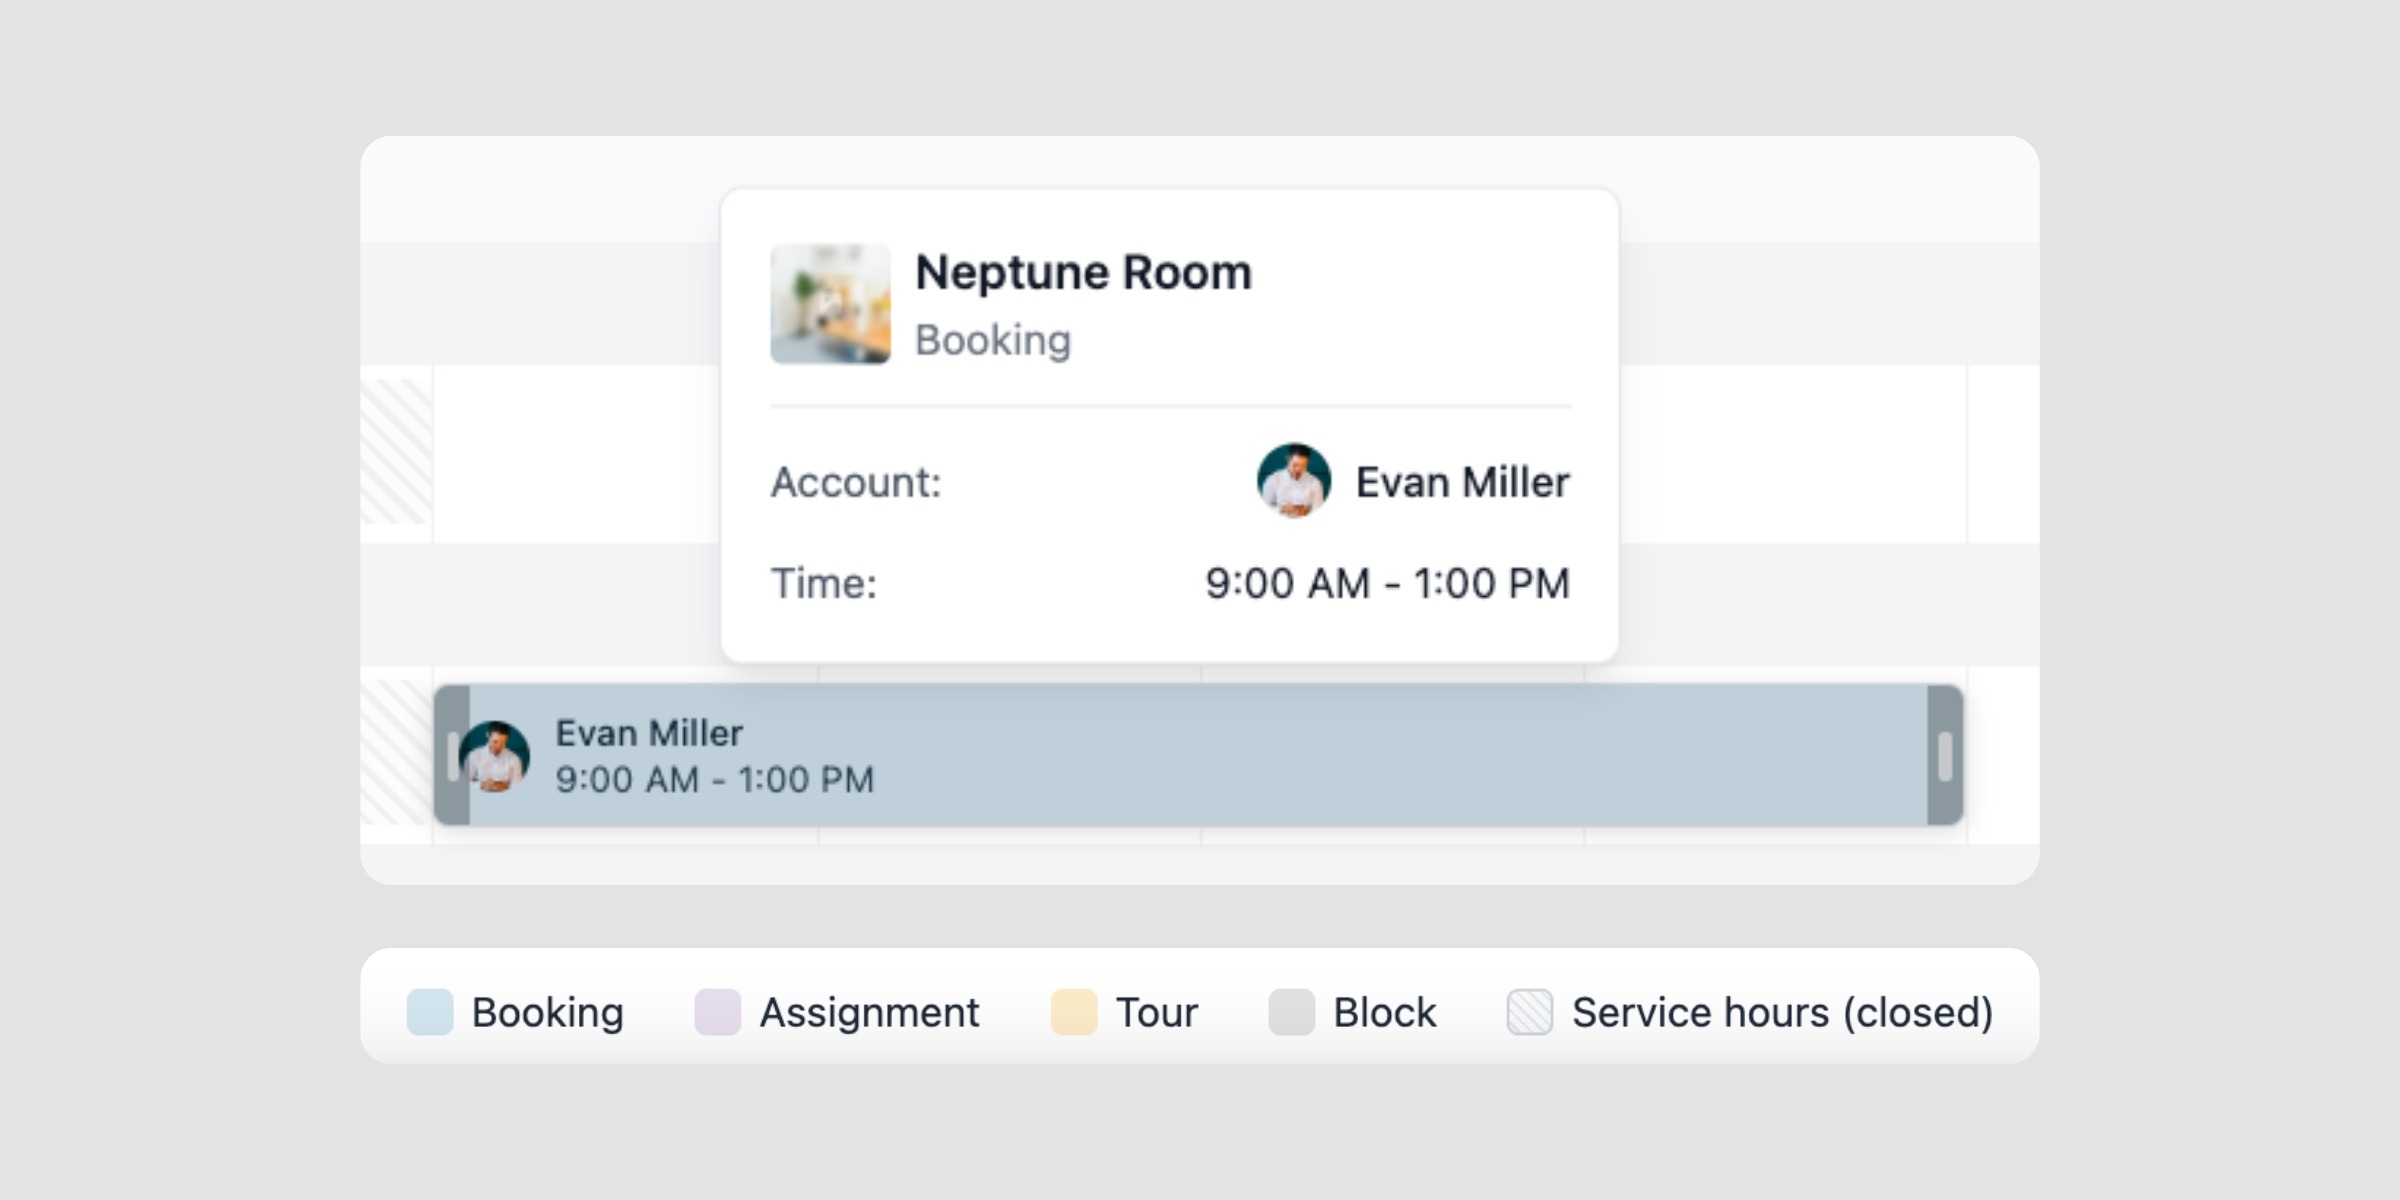
Where the traditional calendar view organises your schedule around dates and individual events, Timeline organises around your resources. Each resource, whether a meeting room, hot desk, studio, or piece of equipment, appears as its own horizontal row. Bookings, assignments, tours, and blocks are shown as colour-coded bars along that row, spanning the time they occupy.
The result is a complete operational picture of your space. Not just who has booked what, but how every resource is being used across your day, week, month, or the next three months. All from one screen.
The existing calendar view is being retired. Timeline is its successor.
Here’s how Timeline changes day-to-day scheduling for your team.
See your full schedule at a glance
With every resource laid out as its own row, you can take in the state of your whole space without opening a single record. A red vertical line marks the current time so you always know what’s happening right now
and what’s coming up next.
Check availability without the guesswork
Use the availability filter to show only resources that are free within a given period. Drag directly on a time slot to start creating a booking. You get the answer you need in a few seconds, without switching between views or manually cross-referencing.
Zoom out to schedule Assignments
If you rent private offices, dedicated desks, or long-term spaces, using Assignments allows you to track utilization, availability, and more. With Timeline, you can now zoom out to see what resources are available for the next three months or more, to be able to schedule Assignments for members that are inquiring about your dedicated resources.
Timeline gives your team a set of tools designed to make resource scheduling faster and more accurate:
Spaces with high booking density
If your meeting rooms, hot desks, and studios run close to capacity throughout the day, Timeline gives you the visibility to manage that load confidently. When multiple resources are booked simultaneously, you can see the full picture at once rather than checking each one individually. Unused time slots are just as visible as fully booked ones, making it easier to identify gaps and act on them.
If your schedule feels difficult to read at peak times, Timeline makes it easier to see exactly what’s available and what isn’t.
Multi-location operators
Managing resources across more than one venue adds coordination complexity, particularly when time zones are involved. Timeline supports native time display with an indicator for your time zone, so your team stays oriented whether they’re scheduling for one location or several. Filtering by location means each view stays focused on the right site.
If you’re coordinating across locations, Timeline gives your team a consistent, resource-centred view that works across all of them.
Front desk and operations teams
For the people managing bookings in real time, answering member questions, handling last-minute changes, and keeping things running smoothly, Timeline means faster answers and fewer steps. Availability is visible immediately. Bookings, assignments, and blocks can all be created directly from the timeline without leaving the view.
If your team handles a steady stream of requests throughout the day, Timeline can help reduce the back-and-forth.
Timeline is now available to all Optix clients in open beta. You’ll find it under Manage > Schedule > Timeline in your admin dashboard.
Have questions or feedback on how we can make Timeline even better? Reach out at support@optixapp.com or via the chat in your admin dashboard.